

Installing Linux VM – Actually Getting Started
Right so we’re at lesson two now. Last lesson we talked about why Linux matters, now we need to actually get you a Linux system to work with by Installing Linux VM on your host.
Linux for Network Engineers – Lesson 1: Getting Started
This is where most people get stuck straight away isn’t it. They spend days researching which Linux to install, whether to use VMware or VirtualBox, dual boot or virtual machine. Week later they still haven’t actually installed anything.
Let me tell you what I did when I started. Spent about five days reading forums trying to work out the “best” setup. Dual boot or VM? Ubuntu or CentOS? VMware or VirtualBox? Everyone had different opinions.
Eventually just picked one and got on with it. Installed Ubuntu in VMware, took maybe an half an hour. Worked perfectly fine.
Those five days I spent researching were completely wasted. Should’ve just installed it and started learning.
So that’s what we’re doing now. I’ll tell you exactly what to install, you’ll install it, and we’ll be done. No overthinking it.
Installing Linux VM vs Dual Boot – Quick Decision
Right so should you install Linux directly on your computer or use a virtual machine?
Virtual machine. Every time. Here’s why.
If you mess up installing linux VM you delete it and start again. Takes twenty minutes. If you mess up a dual boot installation you can corrupt your entire computer. Happened to a mate of mine, lost everything trying to resize partitions for Linux.
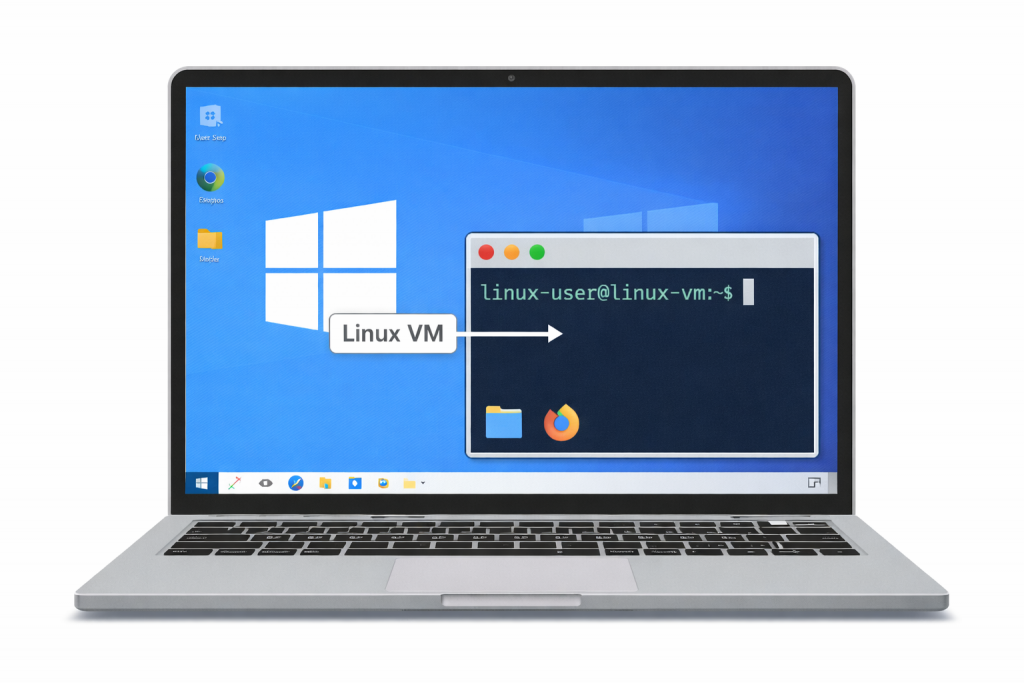
With a VM you run Linux and Windows at the same time. Linux in one window, Windows in another. Much easier for learning because you can have documentation open while you’re working.
VMs let you take snapshots. Before trying something risky, take a snapshot. If it goes wrong, restore back. Can’t do that with a physical installation.
And in real production environments, most Linux servers are VMs anyway. Learning on a VM is closer to how you’ll actually use Linux professionally.
So we’re using a VM. Don’t overthink this.
VMware or VirtualBox – Just Pick One
You need virtualization software to run the VM. Two main choices.
VMware Workstation Player. Free for personal use, bit more polished, generally runs smoother. They made the Player version free a few years back.
VirtualBox. Completely free and open source, works fine, slightly less polished. Owned by Oracle but does the job perfectly well.
Honestly either one is fine. I use VMware because that’s what I started with. But VirtualBox works just as well.
If you’re not sure, go with VirtualBox because it’s completely free with no restrictions. If you want something slightly more polished, grab VMware.
Don’t spend three days deciding. Pick one, install it, move on.
Mac users can use VMware Fusion or VirtualBox. VirtualBox is free, Fusion costs money unless you get the personal license. Same advice, just pick one.
Which Linux Distribution Then
Right so which Linux should you use when installing linux vm on your machine?
Ubuntu Desktop. That’s it. Done.
Now some people will argue about this. “CentOS is what enterprises use” or “Debian is better” or whatever. Load of nonsense for learning.
Ubuntu is the most popular desktop Linux. Means when you Google a problem you’ll find Ubuntu answers. Has the easiest package management. Designed to be user-friendly. Works perfectly in VMs.
And here’s the thing, once you know Linux on Ubuntu you can switch to CentOS or anything else in ten minutes. The fundamentals are identical. Bash is bash, grep is grep, file permissions work the same way everywhere.
We’re using Ubuntu Desktop specifically. Desktop version comes with a graphical interface which makes it easier when you’re starting. Later you might use Ubuntu Server for production stuff, but for learning we want the desktop.
Get the latest LTS version. LTS means Long Term Support, gets updates for five years. At time of writing that’s Ubuntu 24.04 LTS. By the time you read this there might be a newer LTS. Just grab whatever the current LTS is.
Go to ubuntu.com/download and get the desktop version. It’s about 5GB so it’ll take a bit to download depending on your internet.
Installing Your VM Software
Right so while Ubuntu’s downloading, install your virtualization software.
For VMware Workstation Player, go to vmware.com and find the free Player download. Run the installer, click next through it, use all the default settings. Takes about five minutes.
For VirtualBox, go to virtualbox.org and download for your operating system. Install it with default settings. Also about five minutes.
Windows might ask about network adapters during installation. Just click yes or allow, it needs those to let VMs access the network.
Once it’s installed, open it up. You’ll see an empty window with a button to create a new virtual machine. Don’t create anything yet, just have a look at the interface.
That’s it. Software’s installed. Now we wait for Ubuntu to finish downloading.
Creating the Linux Virtual Machine
Right so Ubuntu’s downloaded and your VM software is installed. Now we create the virtual machine.
In VMware click “Create a New Virtual Machine”. In VirtualBox click “New”.
Give it a name. Something like “Ubuntu-Lab” or “Linux-Learning”. Doesn’t really matter, just something you’ll recognize.
Type: Linux Version: Ubuntu 64-bit
Memory: This is RAM for the VM. Minimum 2GB, I’d recommend 4GB if your computer has 8GB or more total. Don’t give the VM more than half your total RAM or your main computer will struggle.
So if you’ve got 8GB total, give the VM 2-4GB. Got 16GB total? Give it 4-6GB.
Create a virtual hard disk. Use VDI format in VirtualBox or VMDK in VMware. Choose “Dynamically allocated” which means it only uses disk space as needed.
Disk size: 20GB minimum, I’d do 40GB to be safe. Don’t worry, it won’t actually use 40GB straight away. It grows as you use it.
Click create.
You’ve now got an empty VM. Like a computer with no operating system yet. We need to install Ubuntu on it.

VM Settings Before Installing Ubuntu
Before we install Ubuntu, let’s sort out a couple of settings.
Right-click your VM and go to Settings.
System or Processor section: Give it 2 CPU cores if your computer has 4 or more. Makes everything run smoother.
Display: Bump video memory to 128MB. Makes the desktop less laggy.
Network: Should already be set to NAT. That’s what we want. Means the VM shares your computer’s internet connection.
Storage: This is important. You’ll see a virtual CD drive. Click on it and choose the Ubuntu ISO file you downloaded. This is like putting an installation disc into the VM.
In VirtualBox it’s in Storage > Controller IDE > Empty > Click the disc icon > Choose a disk file. In VMware it’s in CD/DVD > Use ISO image file > Browse.
Find your Ubuntu ISO and select it.
Save the settings. You’re ready to install.
Installing Ubuntu Step by Step
Right now we actually install Ubuntu.
Start the VM. In VMware click “Power on this virtual machine”. In VirtualBox click “Start”.
VM boots from the ISO and you’ll see Ubuntu starting up. Takes a minute.
You’ll get to a screen saying “Try or Install Ubuntu”. Click “Install Ubuntu”.
Pick your language. English or whatever you prefer.
Keyboard layout. Choose yours, probably UK or US.
Updates and other software. Tick “Normal installation” and “Download updates while installing”. The other tick boxes don’t really matter for learning, up to you.
Installation type. Choose “Erase disk and install Ubuntu”. Don’t panic, this only affects the virtual disk, not your actual computer. The virtual disk is empty anyway so there’s nothing to lose.
Pick your time zone from the map.
Now the important bit. Create your user account.
Your name: Can be anything Computer name: I usually do something like “ubuntu-lab” Username: Keep it simple, like your name or “netadmin” Password: Pick something you’ll remember. Doesn’t need to be super secure for a learning VM.
You can tick “Log in automatically” if you want. Saves typing the password every time. Up to you.
Click Install Now. Confirm when it asks.
It’ll start copying files and installing. Takes 10-15 minutes depending on your computer speed.
Go make a brew.
First Boot Into Ubuntu
When installing linux vm finishes and tells you to restart. Click Restart Now.
Might ask you to remove installation media. VMware handles this automatically. VirtualBox sometimes gets stuck – if it does, just go to Devices menu > Optical Drives and eject the ISO, then reset the VM.
VM reboots and you’ll see the Ubuntu logo while it’s starting.
Few seconds later you’re at the login screen. Type your password if you didn’t tick auto-login.
Welcome to Ubuntu. You’ll see a normal-looking desktop. Wallpaper, taskbar on the left side, some application icons.
First time logging in Ubuntu shows you a welcome screen with “What’s New” and stuff. Just close it, we don’t need it.
Might ask about online accounts. Skip all that. We’re not using this as a daily computer, it’s just for learning Linux.
And that’s it. You’ve got Linux installed and running. Job done.
What You’ve Actually Got Now
Right so you’ve just installed your first Linux system. Let’s talk about what you’re looking at.
The desktop looks fairly normal doesn’t it. Not that different from Windows or Mac really.
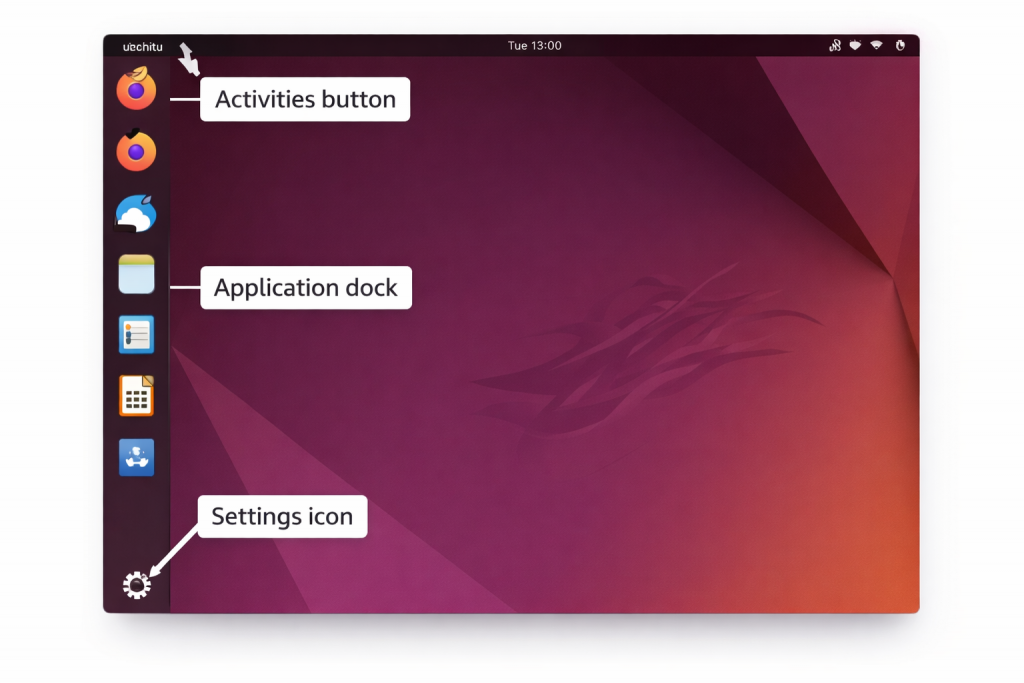
Top bar has Activities button on the left. That’s how you search for applications, like the Windows start menu.
On the right of the top bar you’ll see network icon, sound, battery if applicable, and your username.
Left side has a dock with common applications. Files is the file manager like Windows Explorer. Firefox is the web browser. Terminal is what we’ll use most – but we’re not touching that until next lesson.
You can click around, open the Files app, have a look at Firefox. Get familiar with the interface.
The graphical interface is nice for when you’re starting out. But most of our work will be in Terminal using commands. That starts next lesson though.
For now you’ve just got Ubuntu installed and you can log in. That’s enough.
Taking a Snapshot – Do This Now
Right so before you finish, do this. It’s important.
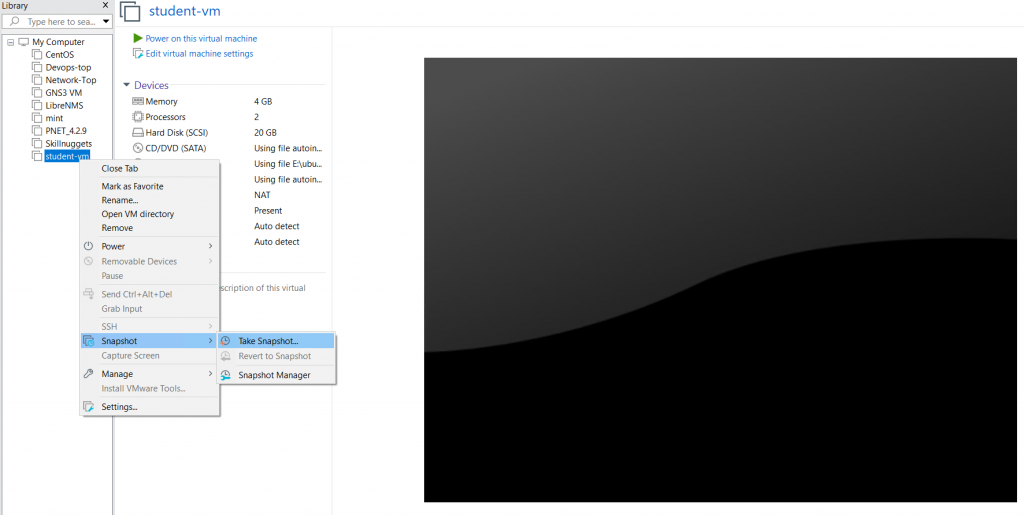
Take a snapshot of your VM right now while it’s in this clean state.
In VMware: VM menu > Snapshot > Take Snapshot. Name it “Fresh Install”. In VirtualBox: Machine menu > Take Snapshot. Name it “Fresh Install”.
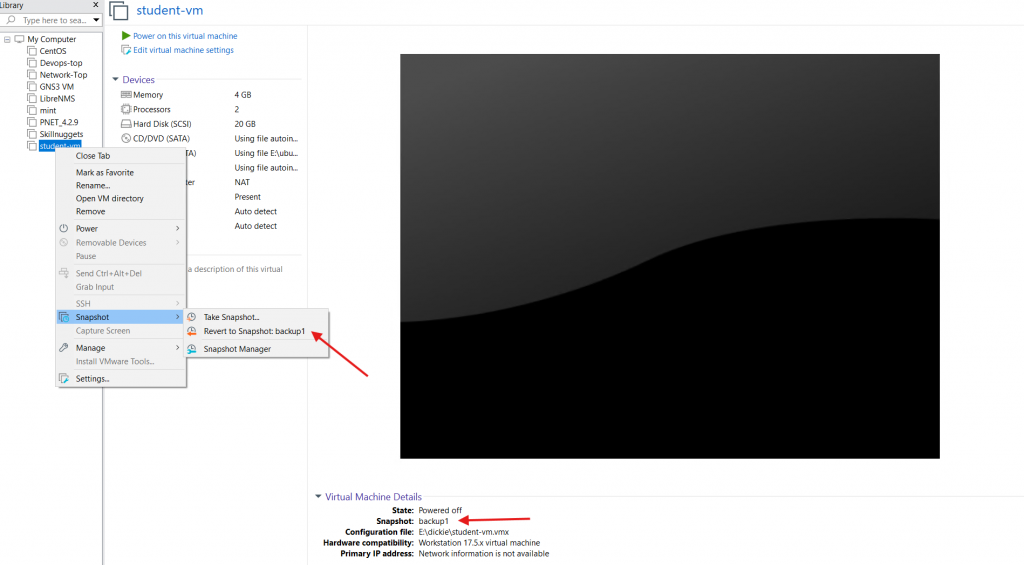
This creates a restore point. If you mess something up in future lessons you can restore back to this clean installation instead of reinstalling everything.
Snapshots are brilliant for learning. Before you try anything risky, take a snapshot. If it goes wrong, restore back. Simple as that.
Get in the habit of taking snapshots before major changes.
Installing WSL on Windows – Windows Subsystem for Linux
So after installing Ubuntu on VMware you have it up and running, however there is an easier way to run Linux if you are on windows 10 or 11.
WSL or windows subsystem for Linux is a stand alone Linux OS running on top of Windows, its FULL LINUX and has some awesome integrations with the windows file system that you mike like.
The video below will show you how to enable WSL on windows 10 (11 is the same) and install a Ubuntu image
What Happens Next
Next lesson we’ll start actually using Linux.
You’ll learn how to open Terminal and use basic navigation commands. How to see where you are in the file system, list files, move between directories. The fundamental commands you need to know.
We’ll also download the course materials – all the network config files and syslog files we’ll use throughout the course.
Then from there we start doing useful stuff. Searching files, managing configs, analysing logs, building automation scripts.
But you needed Linux installed first. That’s done now.
Why This Setup Works for Learning
Let me tell you why learning with a VM is smart.
You can experiment without fear. Try commands, break things, mess stuff up. Worst case you restore a snapshot or delete the VM and make another one. Takes twenty minutes.
It’s how production environments work. Most Linux servers in companies are VMs. Learning on a VM teaches you how you’ll actually work with Linux professionally.
Easy to manage. Don’t like something? Delete it and start fresh. Want to try a different Linux distribution later? Make another VM.
Can’t break your main computer. The VM is completely isolated. Nothing you do in the VM affects Windows or Mac.
Had a student once who installed Linux directly on his laptop as a dual boot. Week later he’d corrupted the boot loader and couldn’t access either operating system. Lost everything, had to pay someone to fix it.
VMs don’t have that problem. They’re safe and isolated.
You’ve done well getting this far. Lot of people never get past installation because they overthink it. You’ve just installed Linux and you’re ready to actually start learning.
Next lesson we get into the actual commands and start doing useful stuff.
External Link: Ubuntu Tutorials – Install Ubuntu Desktop – official step-by-step Ubuntu installation tutorial
Pingback: Linux for Network Engineers Lesson 3: Basic Linux Commands - RichardKilleen