

Automating Network Configuration with Ansible
In this post, we’ll dive into the third lab of our Ansible automation series, where we will be automating network configuration, namely IPv4 address configuration for edge and main routers. This lab focuses on configuring loopback addresses using Ansible playbooks, building structured host and inventory files, and validating the configuration through automated checks while we build on the skills we learned in Lab2.
The aim of this lab is to efficiently manage IPv4 address assignment while minimising manual effort, leveraging Ansible’s ability to automate repetitive tasks. Let’s break down the tasks and the technical details.
Lab Scenario
Your manager has requested that you provide basic IPv4 addressing on all the routers’ interfaces in preparation for more advanced configurations. This lab is designed to help you streamline these tasks using Ansible.
Lab Tasks Overview
- Create or reuse an Ansible host file for all routers.
- Configure loopback addresses on edge routers (R1-R4) using the 100.100.100.x/32 schema.
- Create a playbook to verify your configurations.
- Build an interface YAML file for physical interface IPs and loopbacks.
- Write a playbook to apply these IP addresses and bring interfaces up.
- Verify your configurations to ensure accuracy.
Ansible Host File Configuration
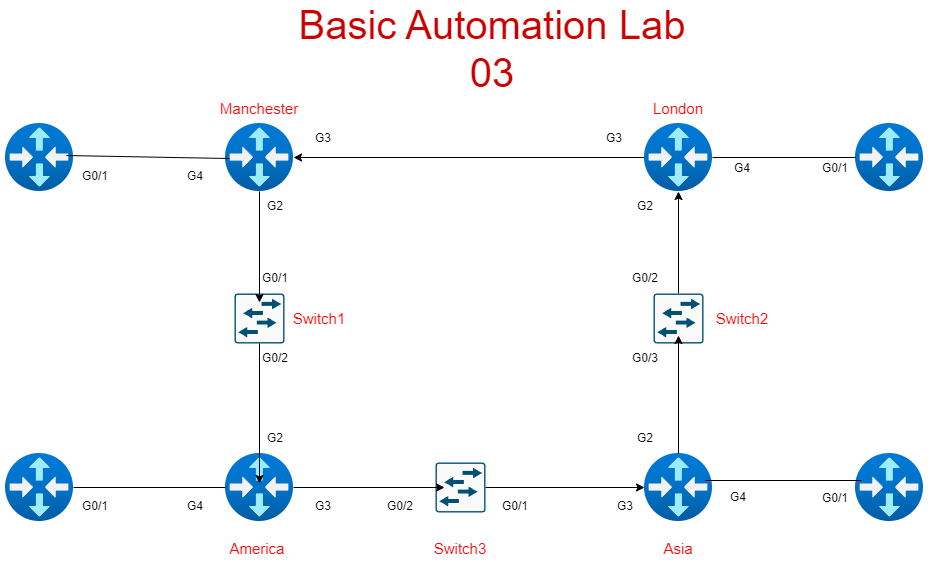
The first step in automating network configuration is creating or reusing an Ansible host file that defines all routers. For this lab, we separate routers into logical groups like edge and main.
[routers]
London ansible_host=192.168.47.194
Manchester ansible_host=192.168.47.132
Asia ansible_host=192.168.47.226
America ansible_host=192.168.47.217

[routers:vars]
ansible_user=YouTube
ansible_ssh_pass=YouTube1
ansible_port=22
ansible_connection=network_cli
ansible_network_os=cisco.ios.ios

[edge]
R1 ansible_host=192.168.47.21
R2 ansible_host=192.168.47.22
R3 ansible_host=192.168.47.23
R4 ansible_host=192.168.47.24

[edge:vars]
ansible_user=YouTube
ansible_ssh_pass=YouTube1
ansible_port=22
ansible_connection=network_cli
ansible_network_os=cisco.ios.ios
Creating the Loopback Configuration Playbook
Next, create a playbook to configure loopback addresses for your edge routers. The IP schema should be 100.100.100.x/32, where x is the router number.
Create a playbook called add_loopback.yml:
---
- name: Configure loopback addresses
  hosts: edge
  gather_facts: no
  connection: network_cli
  tasks:
    - name: Add loopback addresses
      cisco.ios.ios_config:
        lines:
          - interface loopback 0
          - ip address 100.100.100.{{ inventory_hostname[1:] }} 255.255.255.255
          - description edge loopback
          - no shutdown
This playbook uses templating to dynamically assign the correct IP address based on the router hostname. It extracts the numeric part of the hostname (e.g., R1 -> 1) to form the final IP address.
Verifying the Loopback Configuration
Once you’ve applied the loopback configurations, you’ll want to verify them. Create another playbook, show_interface.yml, to check that the interfaces are correctly configured and up:
---
- name: Verify Loopback Interfaces
  hosts: R1,R2,R3,R4
  gather_facts: no
  connection: network_cli
  tasks:
    - name: Show interface descriptions
      cisco.ios.ios_command:
        commands:
          - show interfaces description
          - show ip interface brief | include up
      register: output

    - name: Display interface information
      debug:
        msg: "{{ output.stdout_lines }}"
Building the Interface YAML File
Next, create a Router_Interfaces.yml file to store the IP addresses, descriptions, and subnet masks for your main routers. This file should include all the main routers, ignoring the edge devices you just configured.
Router_Interfaces.yml:
London:
  - intf: GigabitEthernet0/0
    desc: London Uplink
    ip: 192.168.1.1
    mask: 255.255.255.0

Manchester:
  - intf: GigabitEthernet0/0
    desc: Manchester Uplink
    ip: 192.168.2.1
    mask: 255.255.255.0

Asia:
  - intf: GigabitEthernet0/0
    desc: Asia Uplink
    ip: 192.168.3.1
    mask: 255.255.255.0

America:
  - intf: GigabitEthernet0/0
    desc: America Uplink
    ip: 192.168.4.1
    mask: 255.255.255.0
Iterating Over the Interface File
Now, create a final playbook to apply these configurations:
---

- name: configure main routers
  hosts: all
  gather_facts: no
  connection: network_cli
  vars_files:
    - Router_Interfaces.yml

  tasks:
    - name: configure interfaces and no shut
      cisco.ios.ios_config:
        lines:
          - interface {{ item.intf }}
          - description {{ item.desc }}
          - no shutdown
      loop: "{{ interfaces[inventory_hostname] | default([]) }}"

    - name: configure ip
      cisco.ios.ios_config:
        lines:
          - interface {{ item.intf }}
          - ip address {{ item.ip }} {{ item.mask }}
      loop: "{{ interfaces[inventory_hostname] | default ([]) }}"
      when:
        - item.ip is defined
        - item.mask is defined
Key Takeaways:
- Automating loopback and interface configurations reduces manual errors and speeds up the setup process.
- Using YAML for storing interface data improves maintainability.
- Verification playbooks ensure that changes are accurately applied, saving time in troubleshooting.
By following these steps, you streamline your network configuration tasks with Ansible, allowing for consistent and reliable deployments.
Pingback: Ansible Lab 04 Automating Server Configuration and Routers NTP - RichardKilleen