

Process for Adding IPv6 Addresses With Ansible
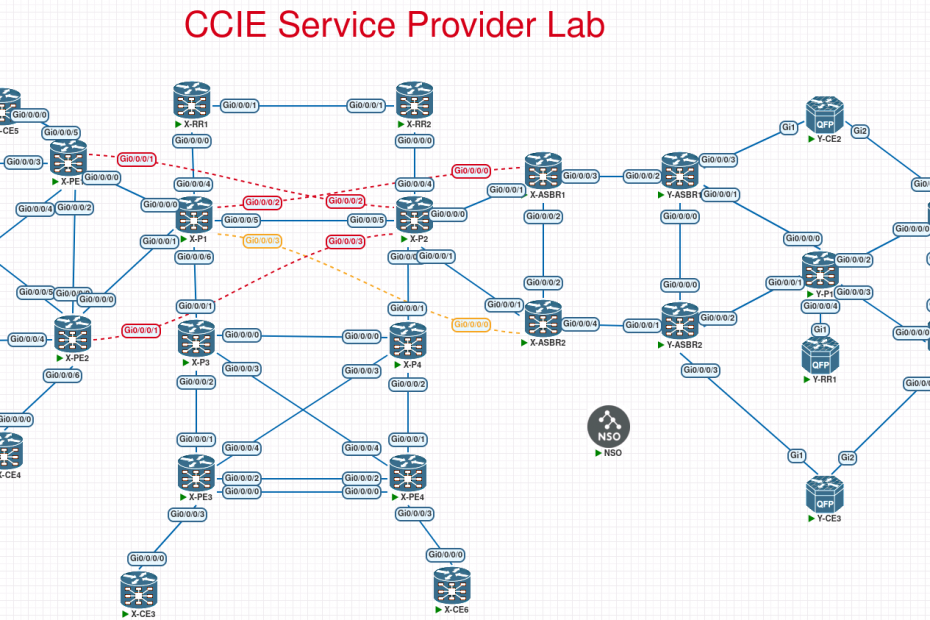
Hello And welcome to this next video in the CCIE service provider lab series. Okay So what we’re going to tackle in this one is we’re going to be adding IPv6 addresses with ansible to the into the devices in the CCIE Service Provider Lab.
Now as you know there’s twenty nine devices and, you know we don’t like configuring IPv6 as the addresses are too long. What I’ve done I’ve built the interface mappins for IPv6 in some Ansible YAML files and this will greatly assist in adding IPv6 addresses with ansible..
So as per the CCIE service provider lab blueprint, Cisco says all devices start with the prefix 2620:fc7. What I’ve done is mapped all the loopbacks IPv4 addresses to the following IPv6 prefix 2620:fc7:0100::
Because the IPv4 address of our loopbacks is 100.0.0.x /32 . So we’re going to use 2620:fc7:0100:: and the last octet /128 so if the IPv4 address is 100.0.0.17 we will convert that into the IPv6 address format 2620:fc7:0100::17/128
Ansible host_vars and Jinja2 Template
Lets have a gander in our host files, we can see here that I’ve added the IPv6 addressing in here according to the actual schematic that Cisco has provided for the actual practice lab and that’s the same for all of the actual devices in the topology and below is an extract of X-CE1.yml
IPv6:
- name: GigabitEthernet 2
ipv6_address: 2620:fc7:172:1101::2/64
- name: GigabitEthernet 3
ipv6_address: 2620:fc7:172:1104::1/64
- name: GigabitEthernet 4
ipv6_address: 2620:fc7:101:1101::1/64
- name: Loopback 0
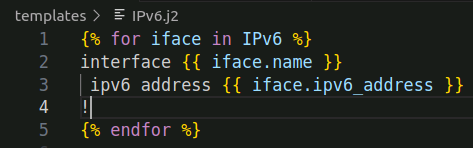
ipv6_address: 2620:fc7:0100::11/128 All in the host files are included above and you can download them along with the Ansible PlayBook and Jinja2 template file. The template itself, you can see in the image below and it will iterate through the interface names and apply the IPv6 address including the /64 and the /128
Adding IPv6 Addressing With Ansible – Playbook
Let’s have a look at the playbook we are going to use that will work in conjunction with the jinja2 template and the host_yaml files to apply the IPv6 addressing.
The playbook is relatively simple, unlike applying IPv4 addresses on Cisco IOX-XE and IOS-XR the commands are the same so there is no need to use the WHEN statement to filter on the OS type.
The Ansible Playbook will just reference the jinja2 template which in turn pulls the structured data from the host_vars files and saves the configuration in a temp directory, the second task takes the entries from the second directory and applyes to the sellected routers, in our case we have applied to all od the devices in the lab.
---
- name: Configure IPv6 addresses on all routers
  hosts: all
  gather_facts: false
  connection: network_cli

  tasks:
    - name: Render IPv6 config from template
      ansible.builtin.set_fact:
        ipv6_config: "{{ lookup('template', 'templates/IPv6.j2') }}"

    - name: Push IPv6 config to device
      ansible.netcommon.cli_config:
        config: "{{ ipv6_config }}"
We run the playbook with the following command.
ansible-playbook IPv6_ADD.ymlWe can see the output from the first task where the IPv6 configuration is being rendered from the jinja2 template and the host_vars yaml files

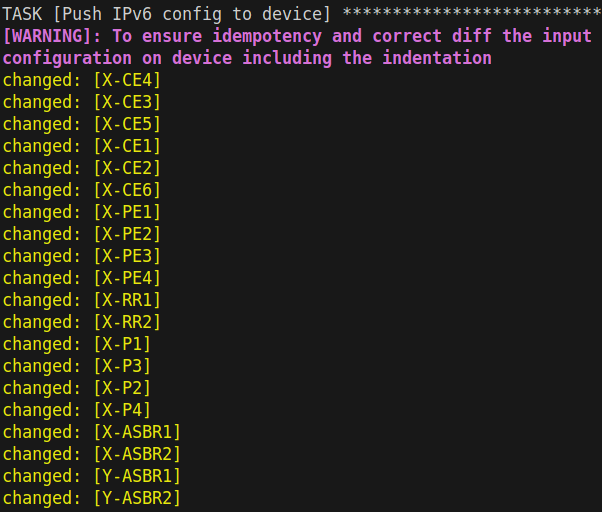
We can see the 2nd tassk in the ansible playbook is now applying the IPv6 addresses to the Cisco IOS-XE and IOS-XR routers
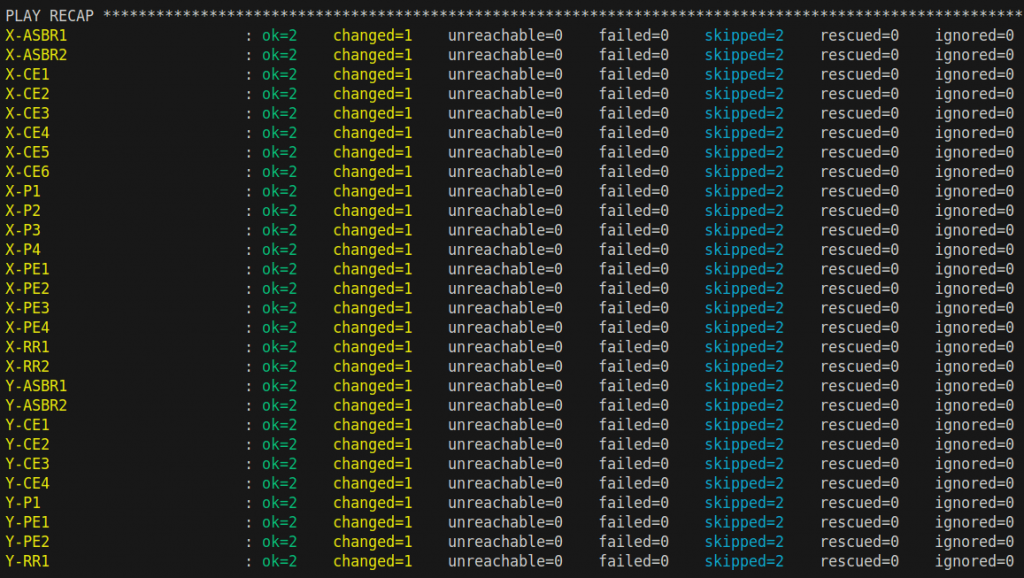
And lastly we can see the sucessful deployment of the ansible playbook which has configured IPv6 on all the lab routers.
Ansible Playbook Validation
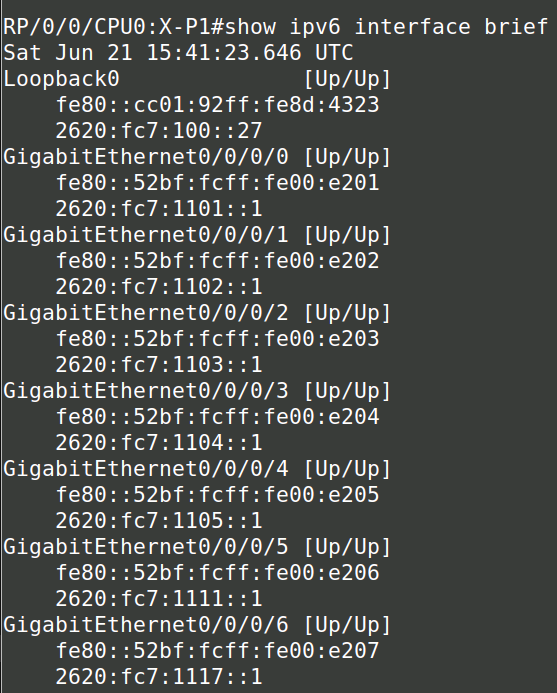
Lets log into one of the bigger routers lets say X-P1 snd have a look at what has been done to the configuration.
Okay Fantastic So we can see that we have addresses on X-P1 now already, we have GigabitEthernet 0/0/0/0 to 0/0/0/6 and loopback 0 configured with the Link-Local and Global IPv6 addresses.
Checking all the other routers I can see that they have also had all the IPv6 addresses configured as per the jinja2 template and host_vars files.
While this might seam like a loot of work we need to remember that it is good pratice to document your network and all we are doing here is using the documented router interfaces to work for us – working smarter not harder.
We have a working script, jinja2 template and documented interface mappings via the host_vars file, this has in my opinion saved us a few hours of manual configuration on the Cisco command line, minimising human errors ( if you watch my videos you know i cant spell my own name 🙂 )
I hope you have enjoyed the blog post and the Youtube Video that goes along with it, in the next post we will tackle applying OSPF and IS-IS on the CCIE lab, and once we have our IGP’s we place we can move to BGP and Segment Routing.
Further reading on IPv6 configuration can be found on the Cisco Website