
Setup and Configuration
Right. So. Look. I get this question loads. “Richard, how do I actually install pyATS properly?” And honestly, half the time when people ask me this, they’ve already ballsed it up somehow. Last week – no, was it last week? Might’ve been the week before – anyway, doesn’t matter. Had this bloke, right, and he’d been trying to get pyATS working for three days. Three days!
Turns out he’d installed it straight onto his system. No virtual environment. Nothing. Just pip install pyATS and wonder why everything’s broken. Don’t be that bloke.
Installing pyats properly isn’t rocket science, but there’s a right way and about fifteen wrong ways. We’re going to do it the right way. Well, mostly the right way. I might show you a shortcut or two that probably isn’t in the documentation.
First Things First – Check Your Python
Right, before we start installing anything. What Python version have you got? Because this trips people up all the time.
pyATS works with Python 3.7 through 3.10. Not 3.11. I know 3.11’s out, I know it’s shiny and new, but pyATS doesn’t like it yet. Found that out the hard way when I tried to show off in a training session and nothing worked. Proper embarrassing that was.
And definitely not Python 2. If you’re still using Python 2 in 2025, we need to have a different conversation entirely.
Check what you’ve got:
python3 --version
Should show something like “Python 3.10.something”. If it says 3.11 or higher, you’ll need to install an older version. If it says 2.7, well… time to upgrade your life choices.
Virtual Environments – Do This Bit First
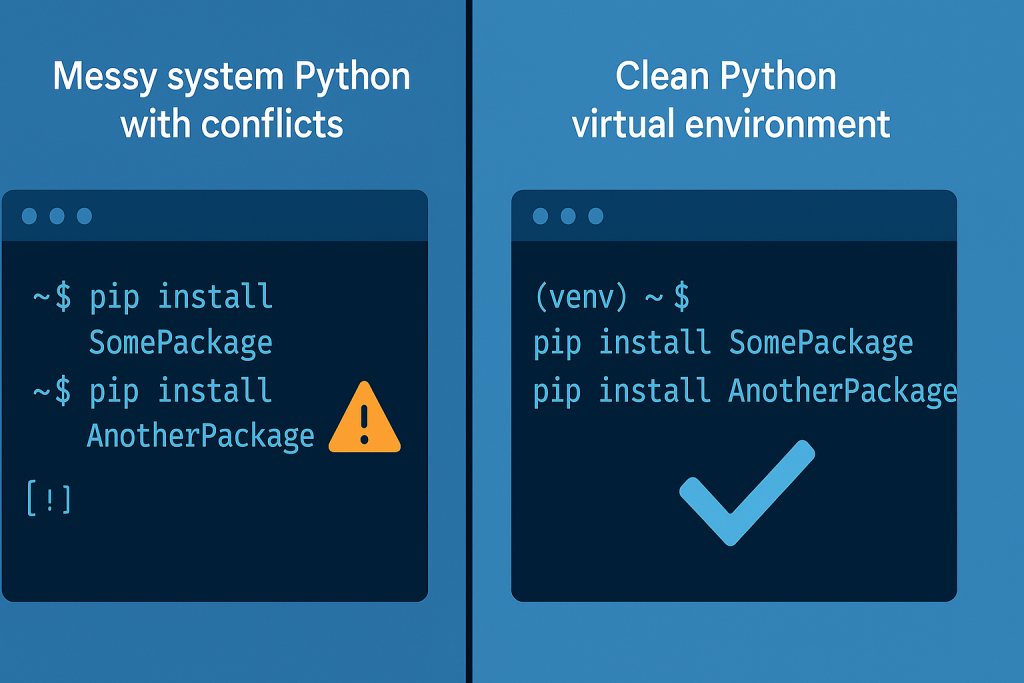
Look, I know virtual environments seem like extra faff. “Why can’t I just install it normally?” Because normal installations are how you end up with dependency hell, that’s why.
I learned this lesson years ago. Had a system where I’d been installing Python packages willy-nilly. Pip this, pip that, no virtual environments anywhere. Worked fine until it didn’t. Then spent two days trying to figure out why requests was version 2.something in one project and version 1.something in another and everything was broken.
Don’t be me. Use virtual environments.
# Make a folder for your pyATS stuff first
mkdir pyats-work
cd pyats-work

# Create the virtual environment
python3 -m venv .venv

# Activate it
source .venv/bin/activate
You’ll see (.venv) appear in your prompt. That’s good. That means you’re in the virtual environment now. Everything you install here stays here.
Quick test – run which python and make sure it points to your .venv folder. If it doesn’t, something’s gone wrong with the activation. Deactivate and try again.
Windows People – Listen Up
Windows isn’t officially supported. Don’t even try installing pyATS directly on Windows. Just don’t. I’ve seen the error messages. They’re not pretty.
Use WSL instead. Windows Subsystem for Linux. It’s brilliant actually.
If you haven’t got WSL:
# Run this in PowerShell as administrator
wsl --install
Restart when it tells you to. It’ll install Ubuntu by default which is perfect.
Once you’re in Ubuntu, do the Python virtual environment bit I just showed you. Same commands, same process.
I use WSL for loads of stuff now. Half the time I forget I’m not on proper Linux.
macOS – Usually Fine But…
macOS usually just works. Apple includes Python but it’s often old. If you’re on an ancient Mac, you might need to install a newer Python first.
I’d use Homebrew:
# Install Homebrew if you haven't got it
/bin/bash -c "$(curl -fsSL https://raw.githubusercontent.com/Homebrew/install/HEAD/install.sh)"

# Install Python 3.10
brew install python@3.10
Then do the virtual environment thing with python3.10 -m venv .venv.
Actually, hang on. Let me check what the latest supported version is. Because I always forget. Right, yes, 3.10’s fine. 3.11’s the problem child.
Actually Installing pyATS
Right, so you’ve got your virtual environment activated. You can see (.venv) in your prompt. Good.
Now, installing pyats is actually two things. The core framework and the library. Used to be called Genie, the library bit. Still is in the package names actually.
You can install them separately but why would you? Just install everything:
(.venv) dickie1@lab-machine:~$ pip install pyats"[full]"
This takes a while. Like, properly takes a while. Go make a cup of tea. There are loads of dependencies to download.
Actually, know what, let me show you something while that’s downloading. You can watch what it’s doing:
pip install -v pyats[full]
The -v flag shows you all the verbose output. Might be interesting if you’re into that sort of thing. Personally, I just let it get on with it.
When Things Go Wrong
Right, so the installation’s finished. Or maybe it hasn’t. Maybe you’ve got errors. Let’s troubleshoot the common ones.
“Command not found: pyats”
This usually means you’re not in your virtual environment. Did you remember to activate it?
source .venv/bin/activate
Should see (.venv) in your prompt again.
Or maybe the installation actually failed but didn’t give you an obvious error. Happens sometimes. Try again:
pip uninstall pyats
pip install pyats[full]
SSL Certificate Errors
Corporate firewalls. Hate them. If you’re getting SSL errors:
pip install --trusted-host pypi.org --trusted-host pypi.python.org --trusted-host files.pythonhosted.org pyats[full]
That’s a lot to type. I usually just copy-paste it from my notes.
Something About Dependencies
If you get conflicts about different packages wanting different versions of the same thing, your virtual environment’s probably contaminated. Start fresh:
deactivate
rm -rf .venv
python3 -m venv .venv
source .venv/bin/activate
pip install pyats[full]
Bit drastic but it works.
Did It Actually Work?
Let’s test it. First, check what got installed:
pip list
You should see loads of packages. Look for ones starting with “pyats” and “genie”. If you see those, you’re probably golden.
Test the command line:
pyats --help
Should show you help text. If it does, brilliant. Installation worked.
Quick test script to make sure everything’s actually functioning:
# test.py
from pyats import aetest

print("pyATS imported successfully")

class QuickTest(aetest.Testcase):
    @aetest.test
    def test_basic_stuff(self):
        self.passed("Everything's working")

if __name__ == '__main__':
    aetest.main()
Run it:
python test.py
Should run and show PASSED. If it does, you’re sorted.
Different Ways to Install
Actually, let me backtrack a bit. There are different ways to install pyATS depending on what you need.
Just the Core Framework
If you only want the basic testing framework:
pip install pyats
But honestly, why would you? You’ll end up needing the library bits anyway.
Core Plus Library (What I Usually Do)
pip install pyats[library]
Gets you the core framework plus the Genie library. Most of what you need.
Everything (Recommended)
pip install pyats[full]
Core, library, optional dependencies, everything. Takes longer to download but you won’t be missing anything.
I usually go with this one. Disk space is cheap, and you never know what you’ll need later.
Specific Versions
Sometimes you need a specific version. Maybe you’re working with existing scripts that need an older version.
# Specific version
pip install pyats[full]==23.8

# Version range
pip install "pyats[full]>=23.0,<24.0"
I keep notes of which versions work with which projects. Saves time later.
Setting Up Your Environment Properly
Right, so pyATS is installed. But we’re not done. Let’s get your environment set up properly.
IDE Setup
I use VS Code. Not because it’s the best – well, maybe it is – but because everyone uses it. Easy to get help when things go wrong.
Install the Python extension. Actually, install the Python extension pack. Gets you syntax highlighting, debugging, all that good stuff.
Make sure VS Code knows about your virtual environment. Should pick it up automatically but sometimes it doesn’t. Check the bottom left corner – should show something like “Python 3.10.x (.venv)”.
Configuration Files
Create a proper project structure:
mkdir my-pyats-project
cd my-pyats-project
python3 -m venv .venv
source .venv/bin/activate
pip install pyats[full]

# Create project folders
mkdir tests
mkdir testbeds
mkdir results

# Save your requirements
pip freeze > requirements.txt
That requirements.txt file is important. Means you can recreate the same environment on different machines.
Environment Variables
Couple of environment variables that make life easier:
# Add to your .bashrc or .zshrc
export PYATS_LOG_LEVEL="INFO"
export PYATS_ROOT="$HOME/pyats-projects"

# Alias for activating environment
alias pyats-env="source .venv/bin/activate"
Now you can just type pyats-env instead of the full activation command.
Docker If You’re Into That
Some people like Docker. I’m not one of them for development work, but each to their own.
Basic Dockerfile that works:
FROM ubuntu:latest

RUN apt -y update && \
    apt-get install python3 -y && \
    apt install python3-pip -y && \
    apt install openssh-client -y

RUN pip install pyats[full]

# Might need this markupsafe fix
RUN pip uninstall --yes markupsafe && \
    pip install markupsafe==1.1.1

COPY ./testbed.yaml ./
Build it, run it, job done. Good for CI/CD pipelines where you want consistent environments.
Upgrading pyATS
pyATS gets updated fairly regularly. New parsers, bug fixes, new features.
Simple upgrade:
source .venv/bin/activate
pip install --upgrade pyats[full]
Sometimes upgrades break things. If that happens:
# Nuclear option - uninstall everything and reinstall
pip uninstall pyats genie -y
pip cache purge
pip install pyats[full]
I’ve had to do this a few times when major version updates changed dependencies.
Common Gotchas
Wrong Python Version
This catches people out. You install pyATS fine, but then when you try to use it, weird errors. Usually because you’ve got multiple Python versions and you’re not using the right one.
Check with which python – should point to your virtual environment.
Mixing System and Virtual Environment Packages
Don’t install some packages system-wide and others in virtual environments. Pick one or the other. Virtual environments are better.
Corporate Networks
Corporate proxies and firewalls cause all sorts of problems. You might need to configure pip to use your corporate proxy:
pip install --proxy http://proxy.company.com:8080 pyats[full]
Or set environment variables:
export HTTP_PROXY=http://proxy.company.com:8080
export HTTPS_PROXY=http://proxy.company.com:8080
Ask your IT department for the proxy details. They love that sort of question.
Permission Issues
Don’t use sudo with pip. Just don’t. If you’re getting permission errors, something’s wrong with your virtual environment setup.
Start again with a proper virtual environment.
Testing Everything Works
Let’s create a proper test to make sure your installation’s working correctly:
# installation_test.py
from pyats.topology import loader
from pyats import aetest
import logging

# Set up logging so we can see what's happening
logging.basicConfig(level=logging.INFO)

class InstallationTest(aetest.Testcase):

    @aetest.test
    def test_imports(self):
        """Test that we can import the main pyATS modules"""
        try:
            from pyats import aetest
            from pyats.topology import loader
            from genie.libs.parser.utils import get_parser_dict
            self.passed("All imports successful")
        except ImportError as e:
            self.failed(f"Import failed: {e}")

    @aetest.test
    def test_genie_parsers(self):
        """Test that Genie parsers are available"""
        from genie.libs.parser.utils import get_parser_dict
        parsers = get_parser_dict()
        if parsers:
            self.passed(f"Found {len(parsers)} parsers")
        else:
            self.failed("No parsers found")

if __name__ == '__main__':
    aetest.main()
Run this:
python installation_test.py
Should show both tests passing. If they do, your installing pyats process worked properly.
What’s Next
Right, so you’ve got pyATS installed. What now?
Next thing you’ll want to do is create a testbed file. That’s how pyATS knows about your network devices. We’ll cover that in the next post.
But before you do that, spend a bit of time getting familiar with the command line tools:
# See what commands are available
pyats --help

# Check version
pyats version check

# Create a basic testbed template
pyats create testbed
Actually, that last one’s quite handy. Creates a template testbed file you can modify.
Final Thoughts
Installing pyats properly isn’t complicated, but there are definitely ways to mess it up. The key things:
- Use virtual environments. Always.
- Install everything with
pyats[full]unless you’ve got a specific reason not to - Test your installation before you start building complex stuff
- Keep your requirements.txt file updated
And if something goes wrong, don’t panic. Uninstall, create a fresh virtual environment, install again. Usually sorts it out.
I’ve been through all these problems myself. The SSL certificate errors when I was behind a corporate firewall. The dependency conflicts when I tried to be clever and install things separately. The Python version issues when I upgraded to a new version too quickly.
Learn from my mistakes. Do it properly from the start.
Next time we’ll look at setting up your development environment and creating your first testbed. But get this installation bit right first. Everything else builds on having a working pyATS installation.
Learn more about Python virtual environments at Real Python
Pingback: Blog Index: Cisco pyATS Automation - RichardKilleen
I love the way you mentioned Python 3.11 compatibility—so many people miss that part and end up wasting hours. Also, I completely agree about virtual environments; it’s crazy how many people skip that step and wonder why things go haywire.
Thanks for the clear, practical guide to installing pyATS! I especially appreciated the emphasis on using virtual environments, checking your Python version, and avoiding common pitfalls on Windows or macOS. It’s a great help for anyone starting with network automation.
Great reminder to check your Python version before installing! It’s easy to get caught up in the excitement of new versions like Python 3.11, but pyATS really doesn’t play well with it yet. I also learned the hard way that skipping the virtual environment leads to headaches later on.